August 24, 2025
Butterscotch Tart
*This post may contain affiliate links. Please see my disclosure for more details!*
A homemade butterscotch tart with an easy homemade sweetened shortcrust pastry, and easy butterscotch filling
Alright, alright… here is the recipe you are after. I have had endless people ask me for this recipe, so here you go! It’s a deliciously sweet classic that will give you a tasty throw back.
Old school classics
When it comes to baking, I love to bake all of the ‘old school classics’ that you used to get when growing up, and the ones you maybe don’t see as much anymore. This is obviously, slightly dependent on where you grew up (for example, my cornflake tart recipe is in my fourth book, Easy Favourites, but lots of people still haven’t heard of it, whereas lots of people were ecstatic to see it)
I grew up having bakes such as the school cake, jammy coconut traybake, and even on Fridays at my junior school we used to have cookies and chocolate milkshake (which was simply the BEST). So yes, I always have room to publish another one of these beauties.

What is a butterscotch tart
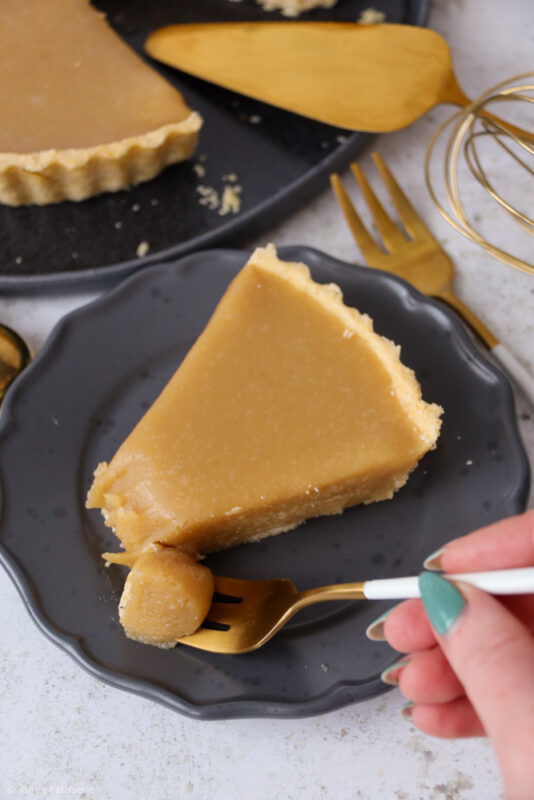
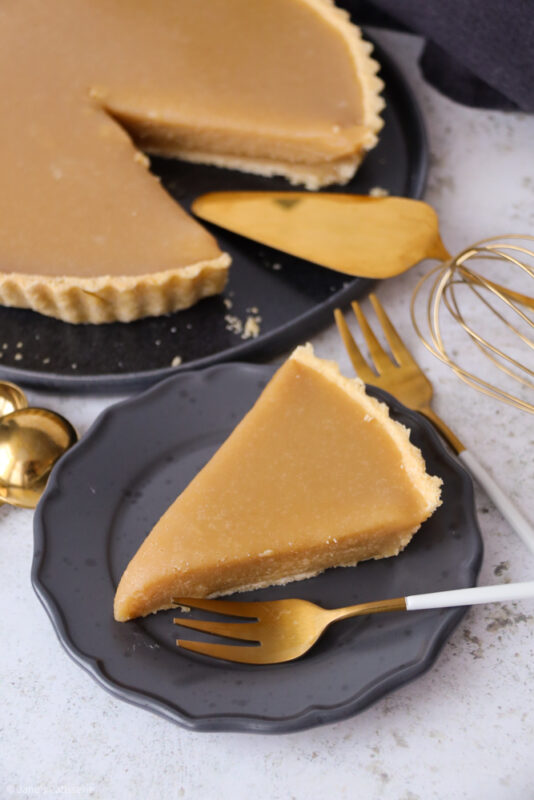
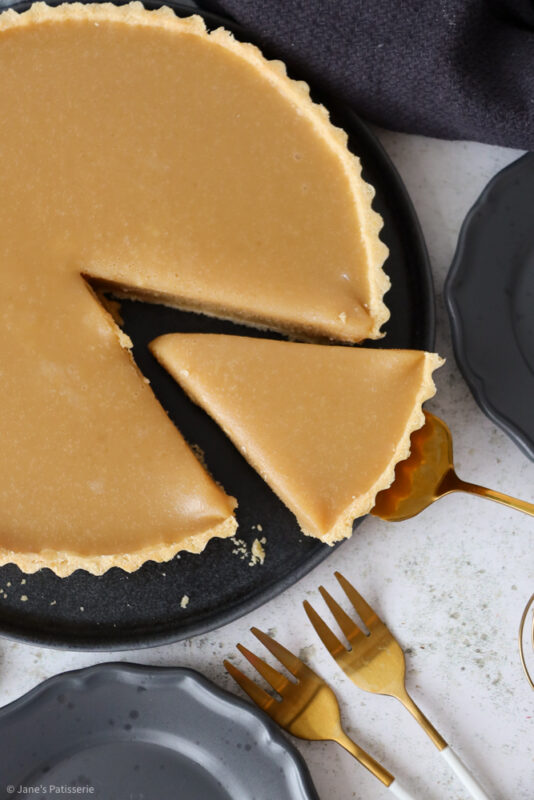
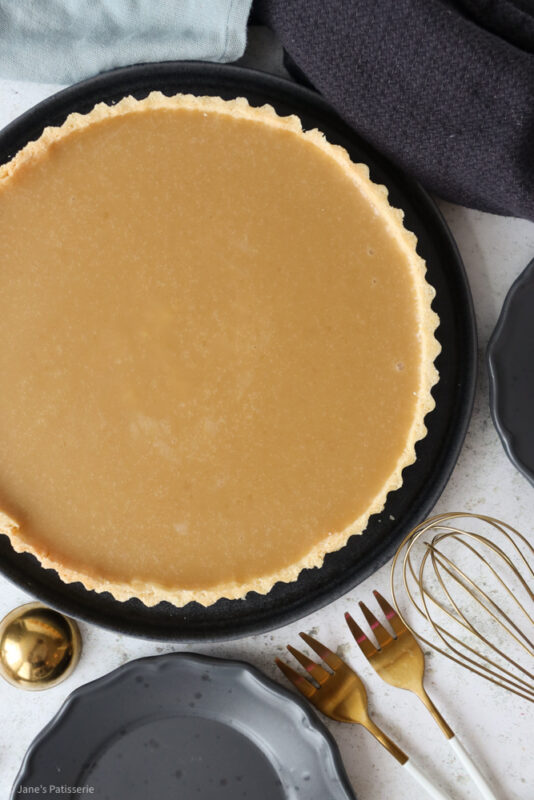
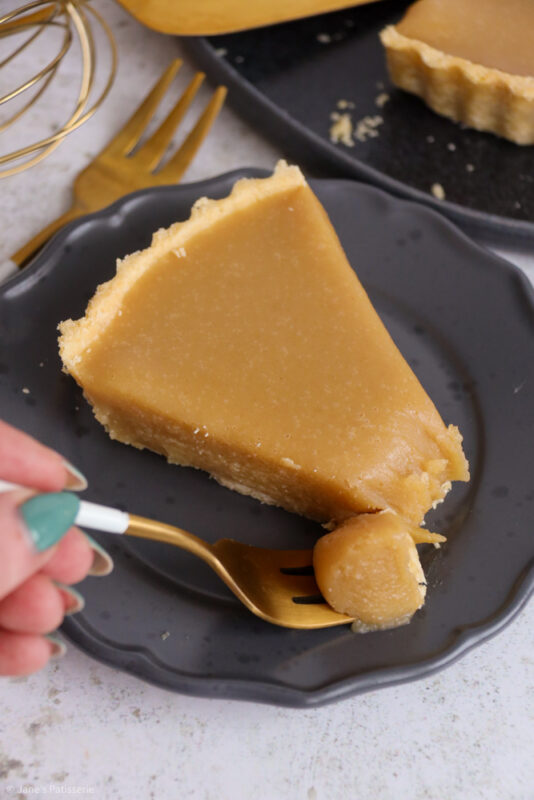
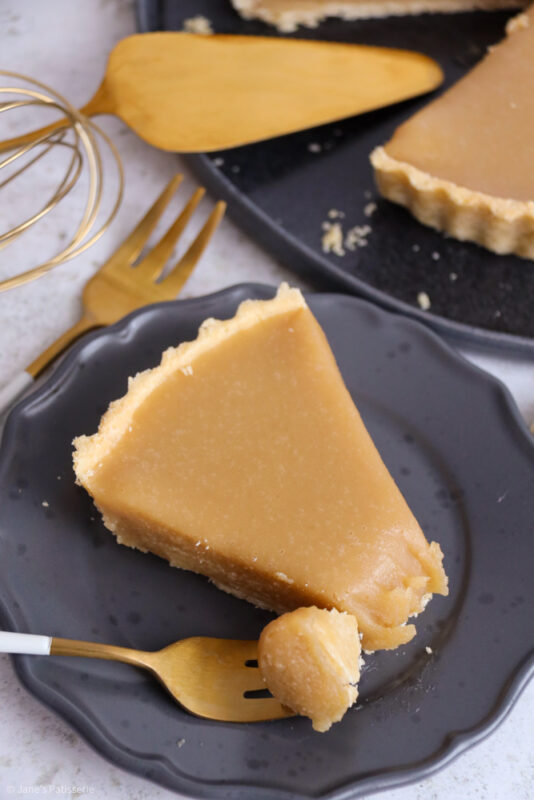
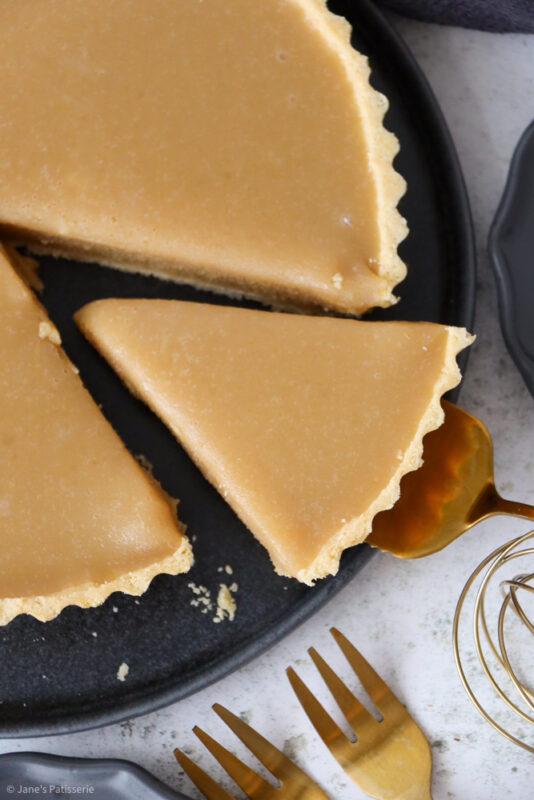
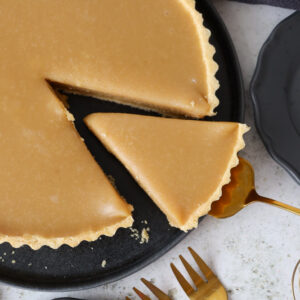
A butterscotch tart is a classic British dessert featuring a shortcrust pastry base filled with a silky, buttery butterscotch mixture. Made with brown sugar and butter, the filling delivers a flavor similar to caramel. This nostalgic treat is especially well known as a staple of traditional British school dinners.
There is discussion about where butterscotch tart actually originates from… such as some people say the 1600s in Scotland, and others say much later into the 19th century in the Yorkshire area – but either way, lots of people had it for pudding as a kid.
Butterscotch tart is also a recipe that I have been unable to avoid being asked for recently, which is why you are reading this now. I always love to ask for recipe requests, but this one was extremely high up the list – and I hope you guys love it. It’s simple, but scrumptious.
Making the pastry
I like making my own shortcrust pastry… it’s honestly way easier than most people think. For sweet shortcrust, I just use a mix of plain flour, unsalted butter, icing sugar, an egg yolk, and a bit of cold water.
I usually make it by hand, which I find super easy, and it also means you’re less likely to overwork the dough. Just throw the flour, cold and cubed butter, and icing sugar into a bowl and rub it together with your fingers until it looks like breadcrumbs. If you’ve got a food processor or are in a hurry, you can definitely use that instead.
After that, add in the egg yolk and a splash of cold water to bring it all together. I use my hands and a spatula to mix it in the bowl, and after a little bit of kneading, you’ll end up with a lovely dough. Give it a quick knead on a floured surface and you’ll have a super smooth pastry.
Since the dough’s been worked a bit, it’s a good idea to let it chill before using. I usually wrap it in clingfilm and pop it in the fridge for about 30 minutes. While it’s chilling, you can grease and flour a 23cm (9-inch) loose bottomed tart tin so it’s all ready to go.
Blind baking a pastry case
Blind baking pastry for a dessert like this, or Bakewell tart for example, is really important to prevent the dreaded ‘soggy bottom’. It’s a process that forces the pastry to bake into the shape of the tin – and it is very easy to achieve.
Roll out the chilled pastry on a lightly floured surface until it’s about as thick as one or two £1 coins (about 5mm). Carefully lift it into your tart tin and press it into the base and sides so it fits nicely. Then grab a piece of parchment paper, pop it on top of the pastry, and fill it with baking beans or uncooked rice.
Bake for 15 minutes, and then take out the parchment and beans, and pop it back in the oven for another 5 minutes to dry it out a bit more. Then, when it’s out of the oven and while it’s still hot, I trim the edges to tidy it up by using a sharp knife and running it along the sides of the tart tin – just be careful, as it’ll still be hot, but then you need to leave the tart case to cool fully anyway before adding the filling.
Making the filling
When it comes to the filling of a butterscotch tart, it might surprise you slightly with its simplicity, but that’s almost the point of it. It’s a quicker to make dessert, that is delightful but sweet.
- Butter – it’s important to use a block butter, as you don’t want the additional ingredients of a margarine or spread
- Sugar – I love to use light brown soft sugar because you want it for the natural caramel flavour, as well as the colour of the end bake
- Flour – I do like to use cornflour, as its natural thickening properties are brilliant, but plain flour is a good ingredient to use and lots of kitchens have this in the cupboard already so I use this in the recipe.
- Milk – I will say, it’s VERY important to use FULL-FAT milk. If you use a lower fat content milk, the filling might not set.
You can also add in some vanilla extract if you want, but as a base I don’t include it because it will inevitably change the flavour of the ‘butterscotch’, and a sprinkle of sea salt is a wonderful addition as well.
Making the filling
Once you have blind baked your tart case, you can make the filling. It’s a relatively simple process, that then just requires a lot of setting time once made (it’s worth it, I promise!)
I start by mixing the flour with some of the milk in the ingredients to a paste – this should help prevent any lumps in the mixture later on. Then, I add the rest of the milk, and the butter to a pan and melt the butter. Once melted, I add my light brown soft sugar and whisk and mix until the sugar has dissolved and the mixture has turned to a caramel colour. Once you have done this, you need to slowly pour in the flour/milk mixture, whisking well, and continuing to whisk over a medium heat until the mixture thickens.
This can take a few minutes, but it’s worth it. You don’t want the heat too high, as it may catch the flour. You also want to make sure to whisk/stir all of the bottom of the pan, to stop anything catching. The heat is there to ‘cook’ the flour out and to cause the sauce to thicken, like you would with a cheese sauce in a lasagne for example.
If you find the flour is looking a smidge lumpy still, even after whisking/stiring in, you can sieve the mixture after you have mixed for a while (to make sure most of the flour stays in the mixture)
Pour the mixture into the baked and trimmed tart tin, and then leave the tart to set for a few hours until firm. If you find the tart is a little soft, it does mean it wasn’t thickened for long enough in the pan over the heat – but it’ll still be edible – just a tip for next time.
Tips & Tricks
- I use this tart tin in my recipe
- This dessert will last for 3+ days in the fridge
- This dessert can freeze for 3+ months
- You can use a shop bought pastry instead – still follow the same baking method. If you use a shop bought pastry shell, they are generally thinner and won’t fit all of the filling.
- You can swap the light brown soft sugar for dark brown soft sugar if you want a deeper molasses flavour
Butterscotch Tart!
Ingredients
Pastry
- 175 g plain flour
- 100 g unsalted butter (cold and cubed)
- 1 tbsp icing sugar
- 1 egg yolk
- splash of cold water
Filling
- 65 g plain flour
- 150 ml milk (full-fat milk)
- 250 g unsalted butter
- 250 g light brown soft sugar
Instructions
Pastry
- Add the flour and icing sugar to a large bowl. Add the cold and cubed unsalted butter and rub the mixture together with your fingertips until it resembles breadcrumbs.
- Add the egg yolk, and 1 tbsp of cold water into the bowl and mix with your hand or a spatula until the pastry dough comes together - it may take a bit of kneading.
- Alternatively, add the ingredients to a food processor and blitz quickly on the pulse setting until the mixture starts to bind, it shouldn't take too long at all
- Grease & flour a 9"/23cm loose bottomed tart tin - Roll the pastry mix out onto a lightly floured surface to the thickness of 1-2 coin(s).
- Press the pastry into the tin and trim & neaten the edges. Fill any gaps of the pastry with any excess pastry so it's all covered. Refrigerate for 30 minutes.
- Preheat the oven to 200ºc/180ºfan - Cover the pastry with baking parchment and fill with baking beans/rice and bake the pastry 'blind' for 15 minutes.
- After 15 minutes, remove the parchment and the beans and bake for an extra 5 minutes or until the pastry is cooked through and turning golden!
- Once baked, leave to cool as you make the filling.
Filling
- In a small bowl, add the plain flour and 50ml of the milk
- Mix these together to a paste and so that there are no lumps of flour left
- In a medium sized pan, add the butter, and the rest of the milk, and heat until the butter has melted.
- Add the light brown soft sugar, and stir to combine and until the sugar has dissolved (low-medium heat)
- Once melted, slowly pour in the flour/milk mixture, and keep stirring whilst heating until the mixture has thickened.
- Pour onto the tart case, and then set the tart in the fridge for 3-4+ hours
- Once set, carefully remove from the tin, and enjoy.
Notes
- I use this tart tin in my recipe
- This dessert will last for 3+ days in the fridge
- This dessert can freeze for 3+ months
- You can use a shop bought pastry instead - still follow the same baking method. If you use a shop bought pastry shell, they are generally thinner and won't fit all of the filling.
- You can swap the light brown soft sugar for dark brown soft sugar if you want a deeper molasses flavour
Enjoy!
Find my other recipes on my recipes page!
You can find me on:
Instagram
Facebook
Pinterest
Twitter
Youtube
J x
© Jane’s Patisserie. All images & content are copyright protected. Do not use my images without prior permission. If you want to republish this recipe, please re-write the recipe in your own words and credit me, or link back to this post for the recipe.